
Corner Balancing

What is corner balancing?
Corner balancing is the process of shifting the carried weight of each tire by adjusting the suspension's spring height. The goal is to get the diagonal weights even, meaning the Right Front and Left Rear corners will carry 50% of the vehicle's total weight and the Left Front and Right Rear corners will carry the other 50%. If these cross weights are not equal, you could compare the suspension to an unstable table with uneven legs. In a car, this translates to turning one direction better than the other.
Some people confuse corner balancing with static weight distribution, which is the left percentage and right percentage of the vehicles weight. This can only be done by physically moving weights inside the vehicle and should be done before your corner balance. With corner balancing, the front/rear and left/right percentages stay constant and we can only shift weights between the diagonal corners.

Preparation

Tire Pressures
Set your tire pressures as they would be HOT on the track. When possible, corner balance on a new set of tires.

weights
Use weights to simulate a fully suited driver. If the seat is adjustable, move it to the driver's driving position. Make sure all the fluids are topped off and the fuel level is where you want it. Fuel levels will slightly change your corner balance depending on where your fuel tank is. You can strategize whether you want the car perfectly balanced in the beginning, middle, or end of a race. If it has a CoolShirt system be sure to account for the weight of the ice water.

ride height
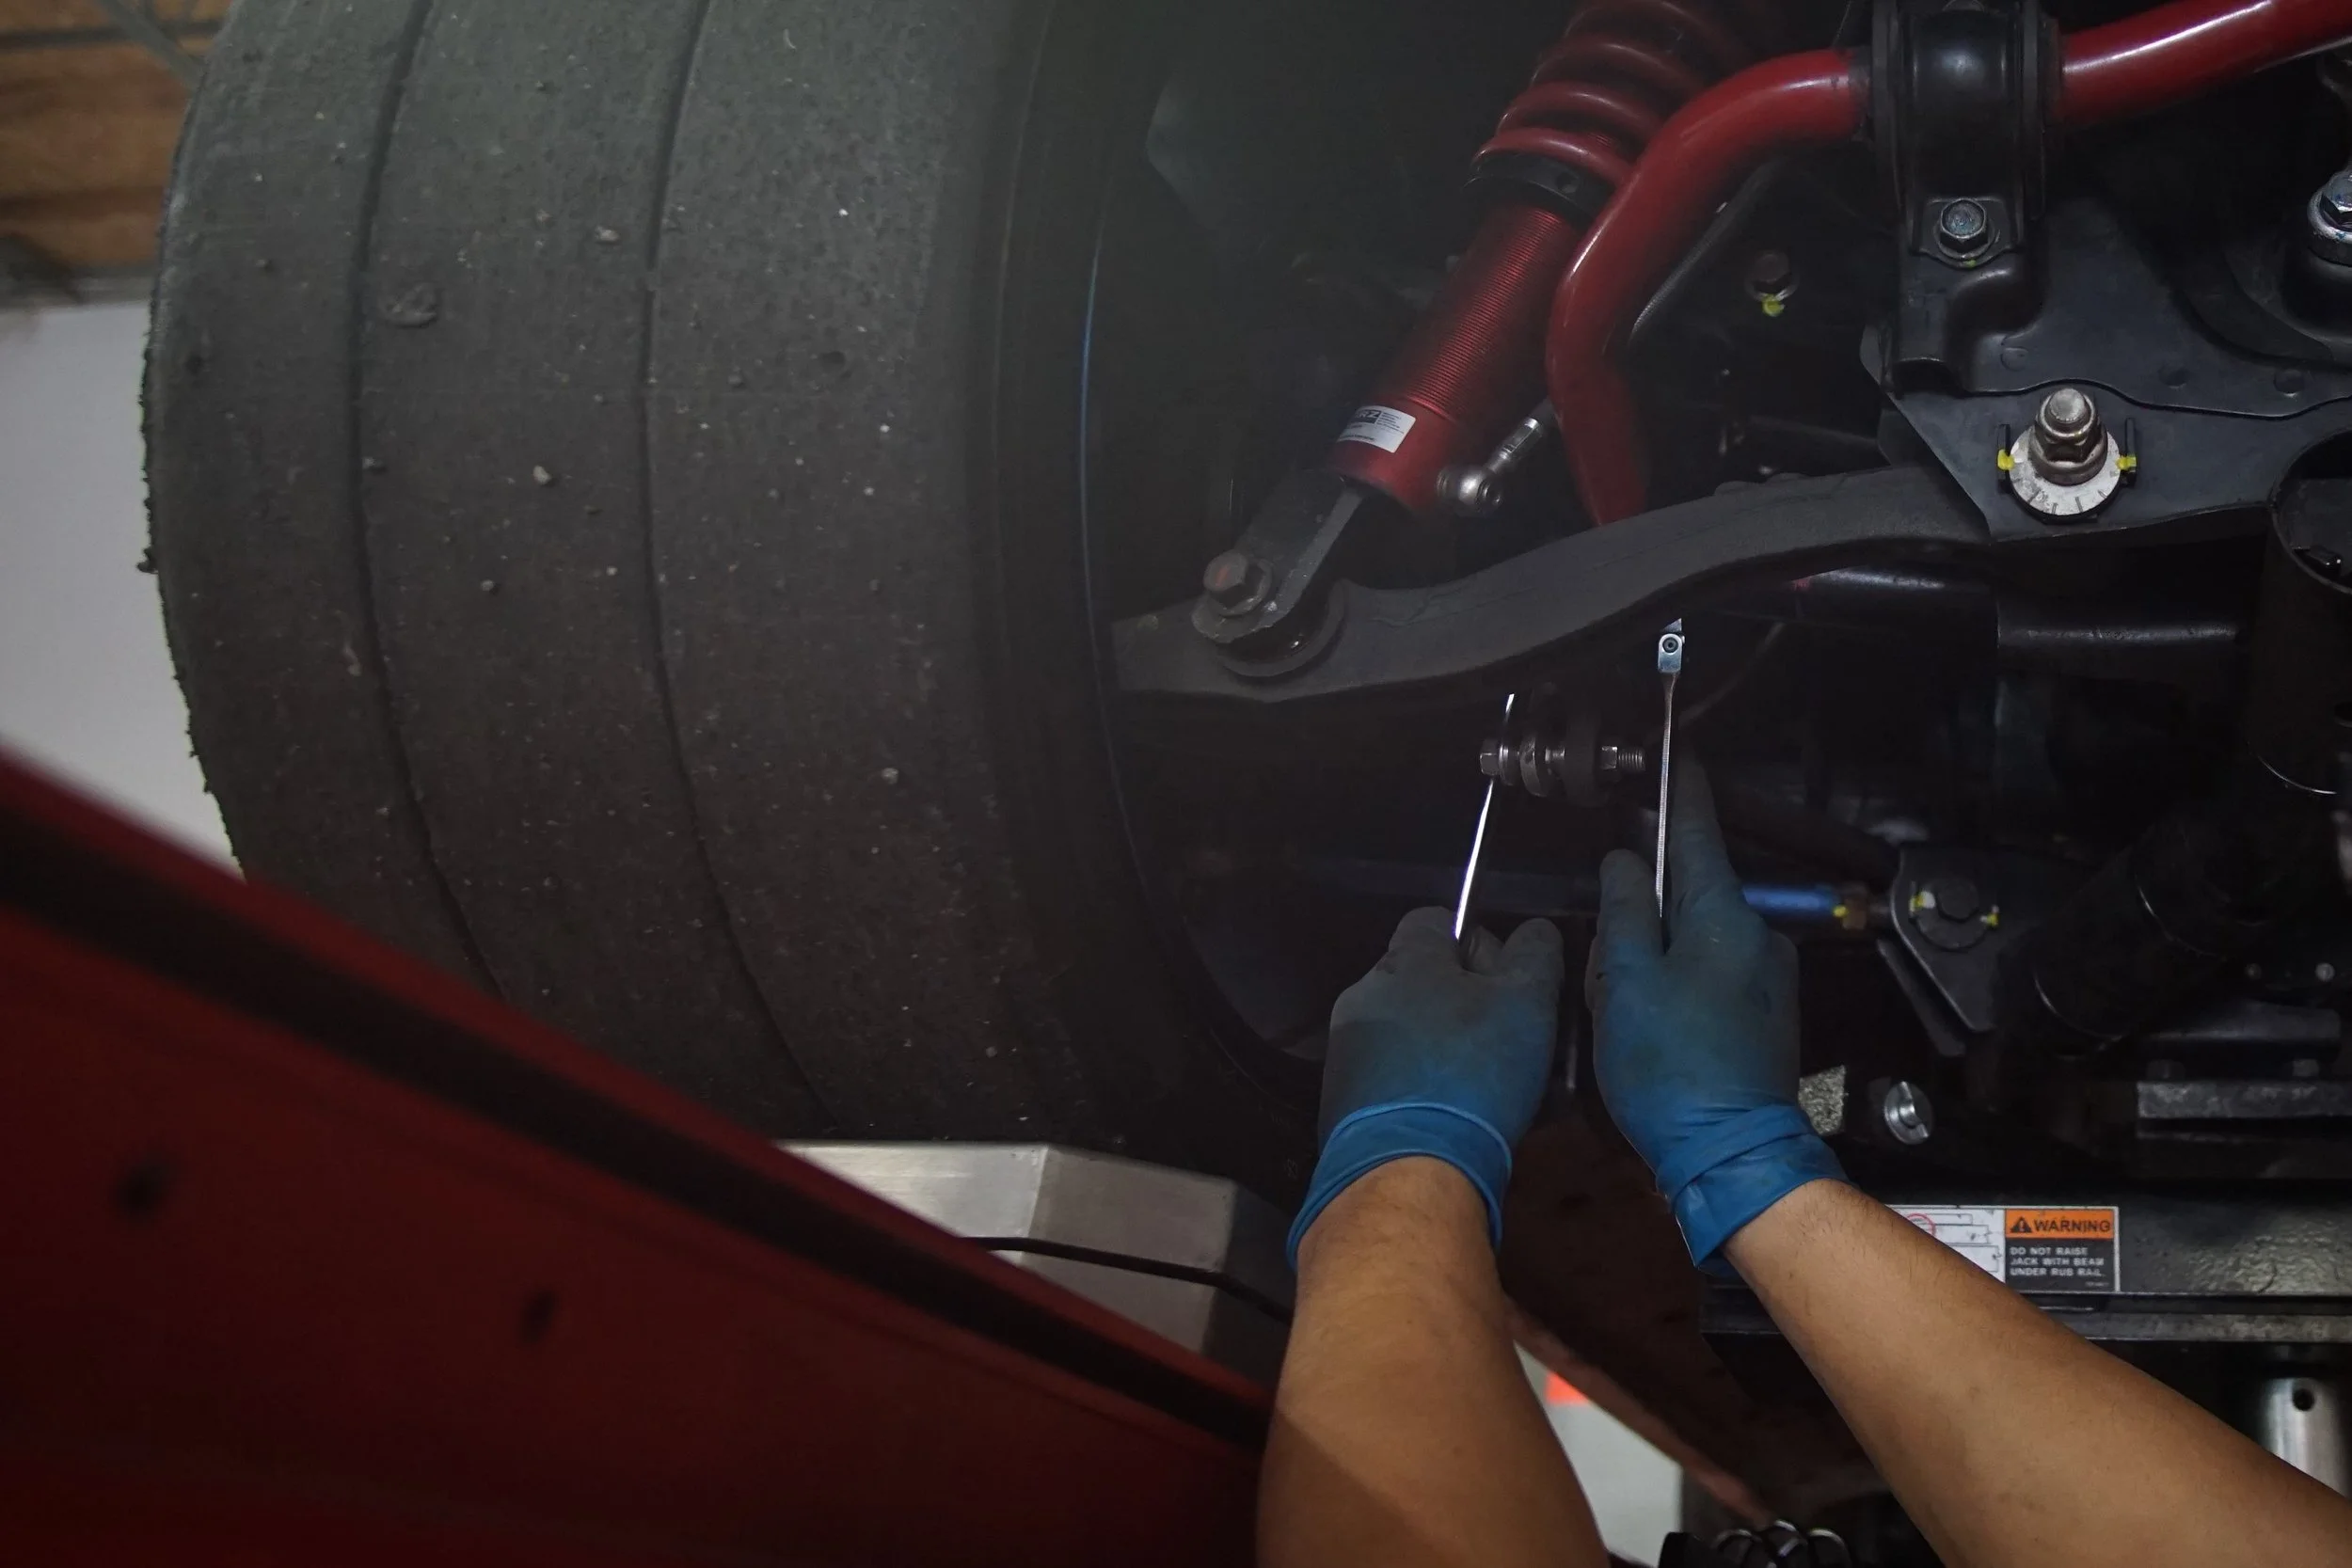
Before setting your ride height, disconnect your sway bar end links to make sure they are not affecting the height by unwanted preload. We recommend disconnecting both sides to remove any bind from the sway bar bushings. The end links will stay disconnected until the corner balance is complete. Start off with an even ride height from side to side and desired rake angle from front to rear. Measuring to the fender can be imprecise, as fender positions can vary quite a bit. It's best to measure the ride height at a point on the frame of the car since this relates to suspension geometry. If you have limitations to minimum ride height in your racing class, make sure you leave some room for adjustments.
Initial Alignment

You will want to do an alignment before the corner balance to make sure the car is sitting exactly how you want it set up. We will have to do a touch-up alignment after the corner balance is done.
Corner Balancing

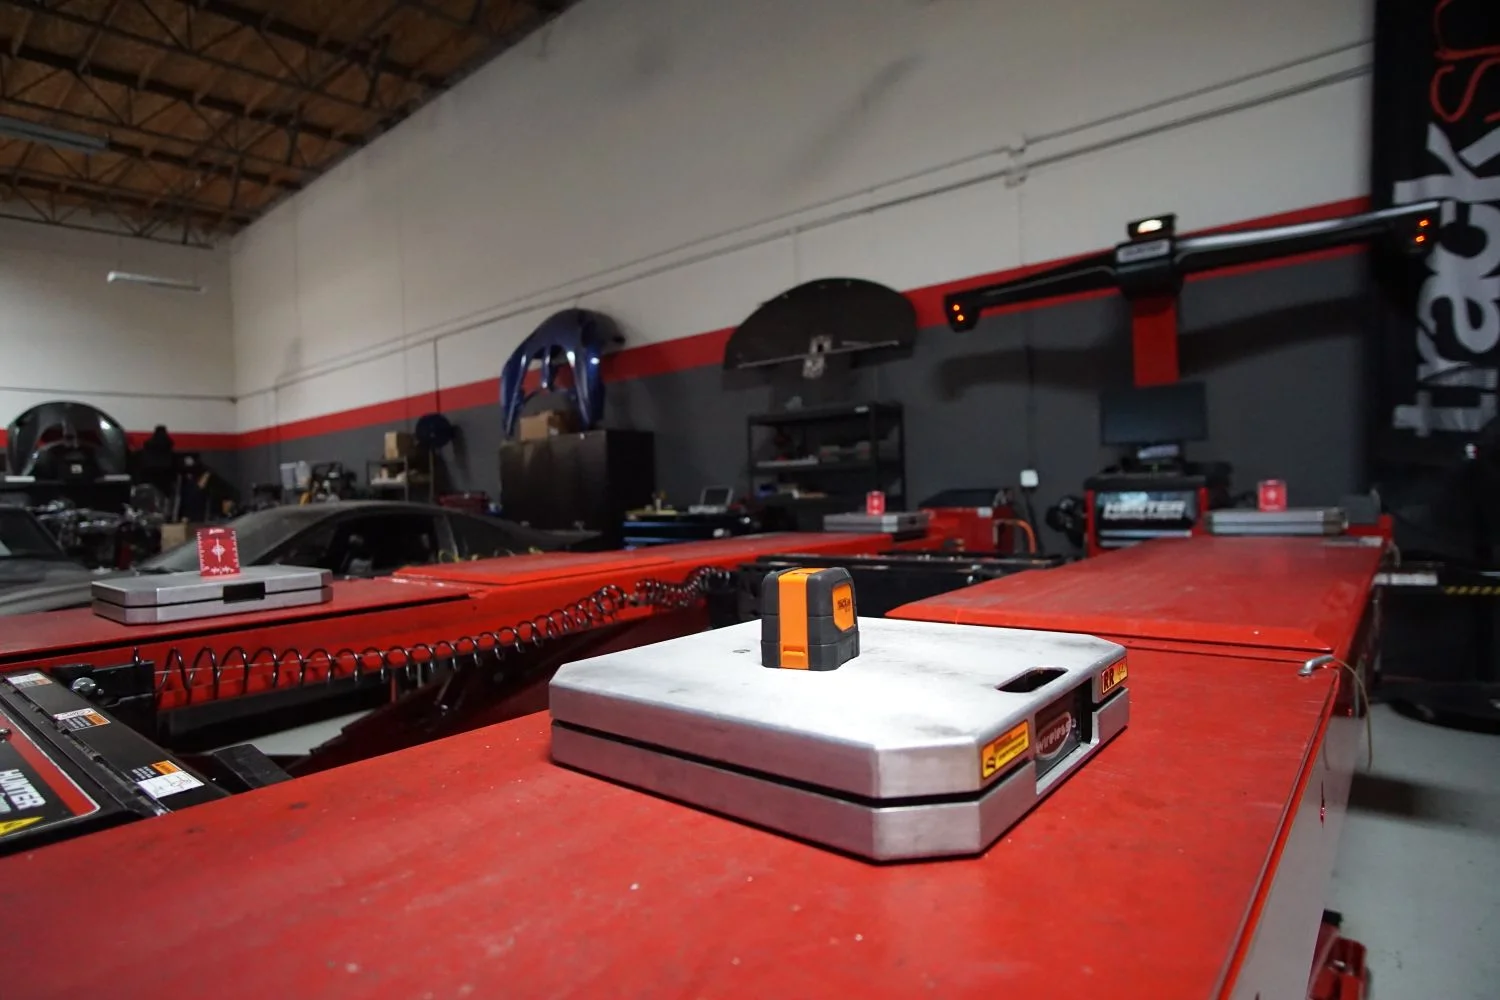
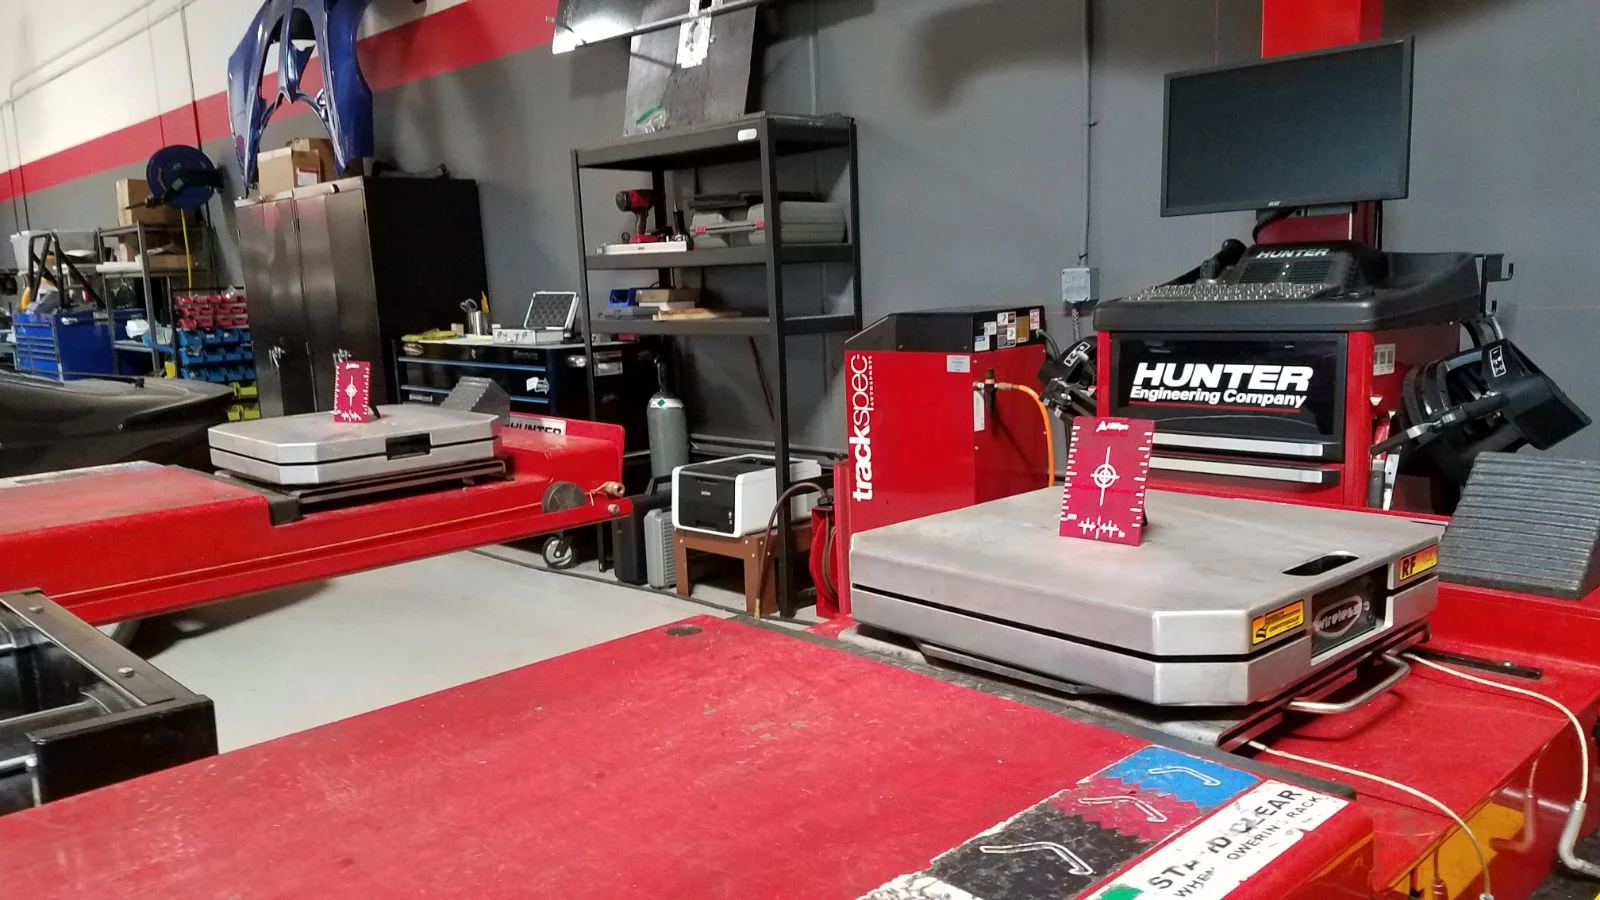
When setting up your scales, you will want to make sure all four pads are perfectly level with each other. Starting off on a relatively level surface helps. Using a laser level with targets is the most accurate way to do this, but a long bubble level works too. If you don't have adjustable levels for your scales, you can use pieces of sheet metal or something similar to shim the scales. Once all four are level, we can begin. Power up the scales and zero them out. You will want to make sure the car is fully settled when taking your weight measurements, otherwise you will get inconsistent readings. There are a couple of ways to do this:
1. ramps
Drive directly onto the scales with ramps to avoid unloading the suspension. This method requires you to drive off the scales and back on after each adjustment. Each time you lift the vehicle and lower it back down, there will be a bind from the tires and bushings that need to be relieved by rolling back and forth.
2. roll-off platforms
This allows you to roll the car back and forth several time after each adjustment to relieve the suspension bind. A simple solution would be to use wood boards the same thickness as the scales. Be sure to use wheel chocks so you don't accidentally roll the car off the platforms or scales.
3. slip plates
These will allow the scales to spread out as the car is lowered back down onto them after an adjustment is made.
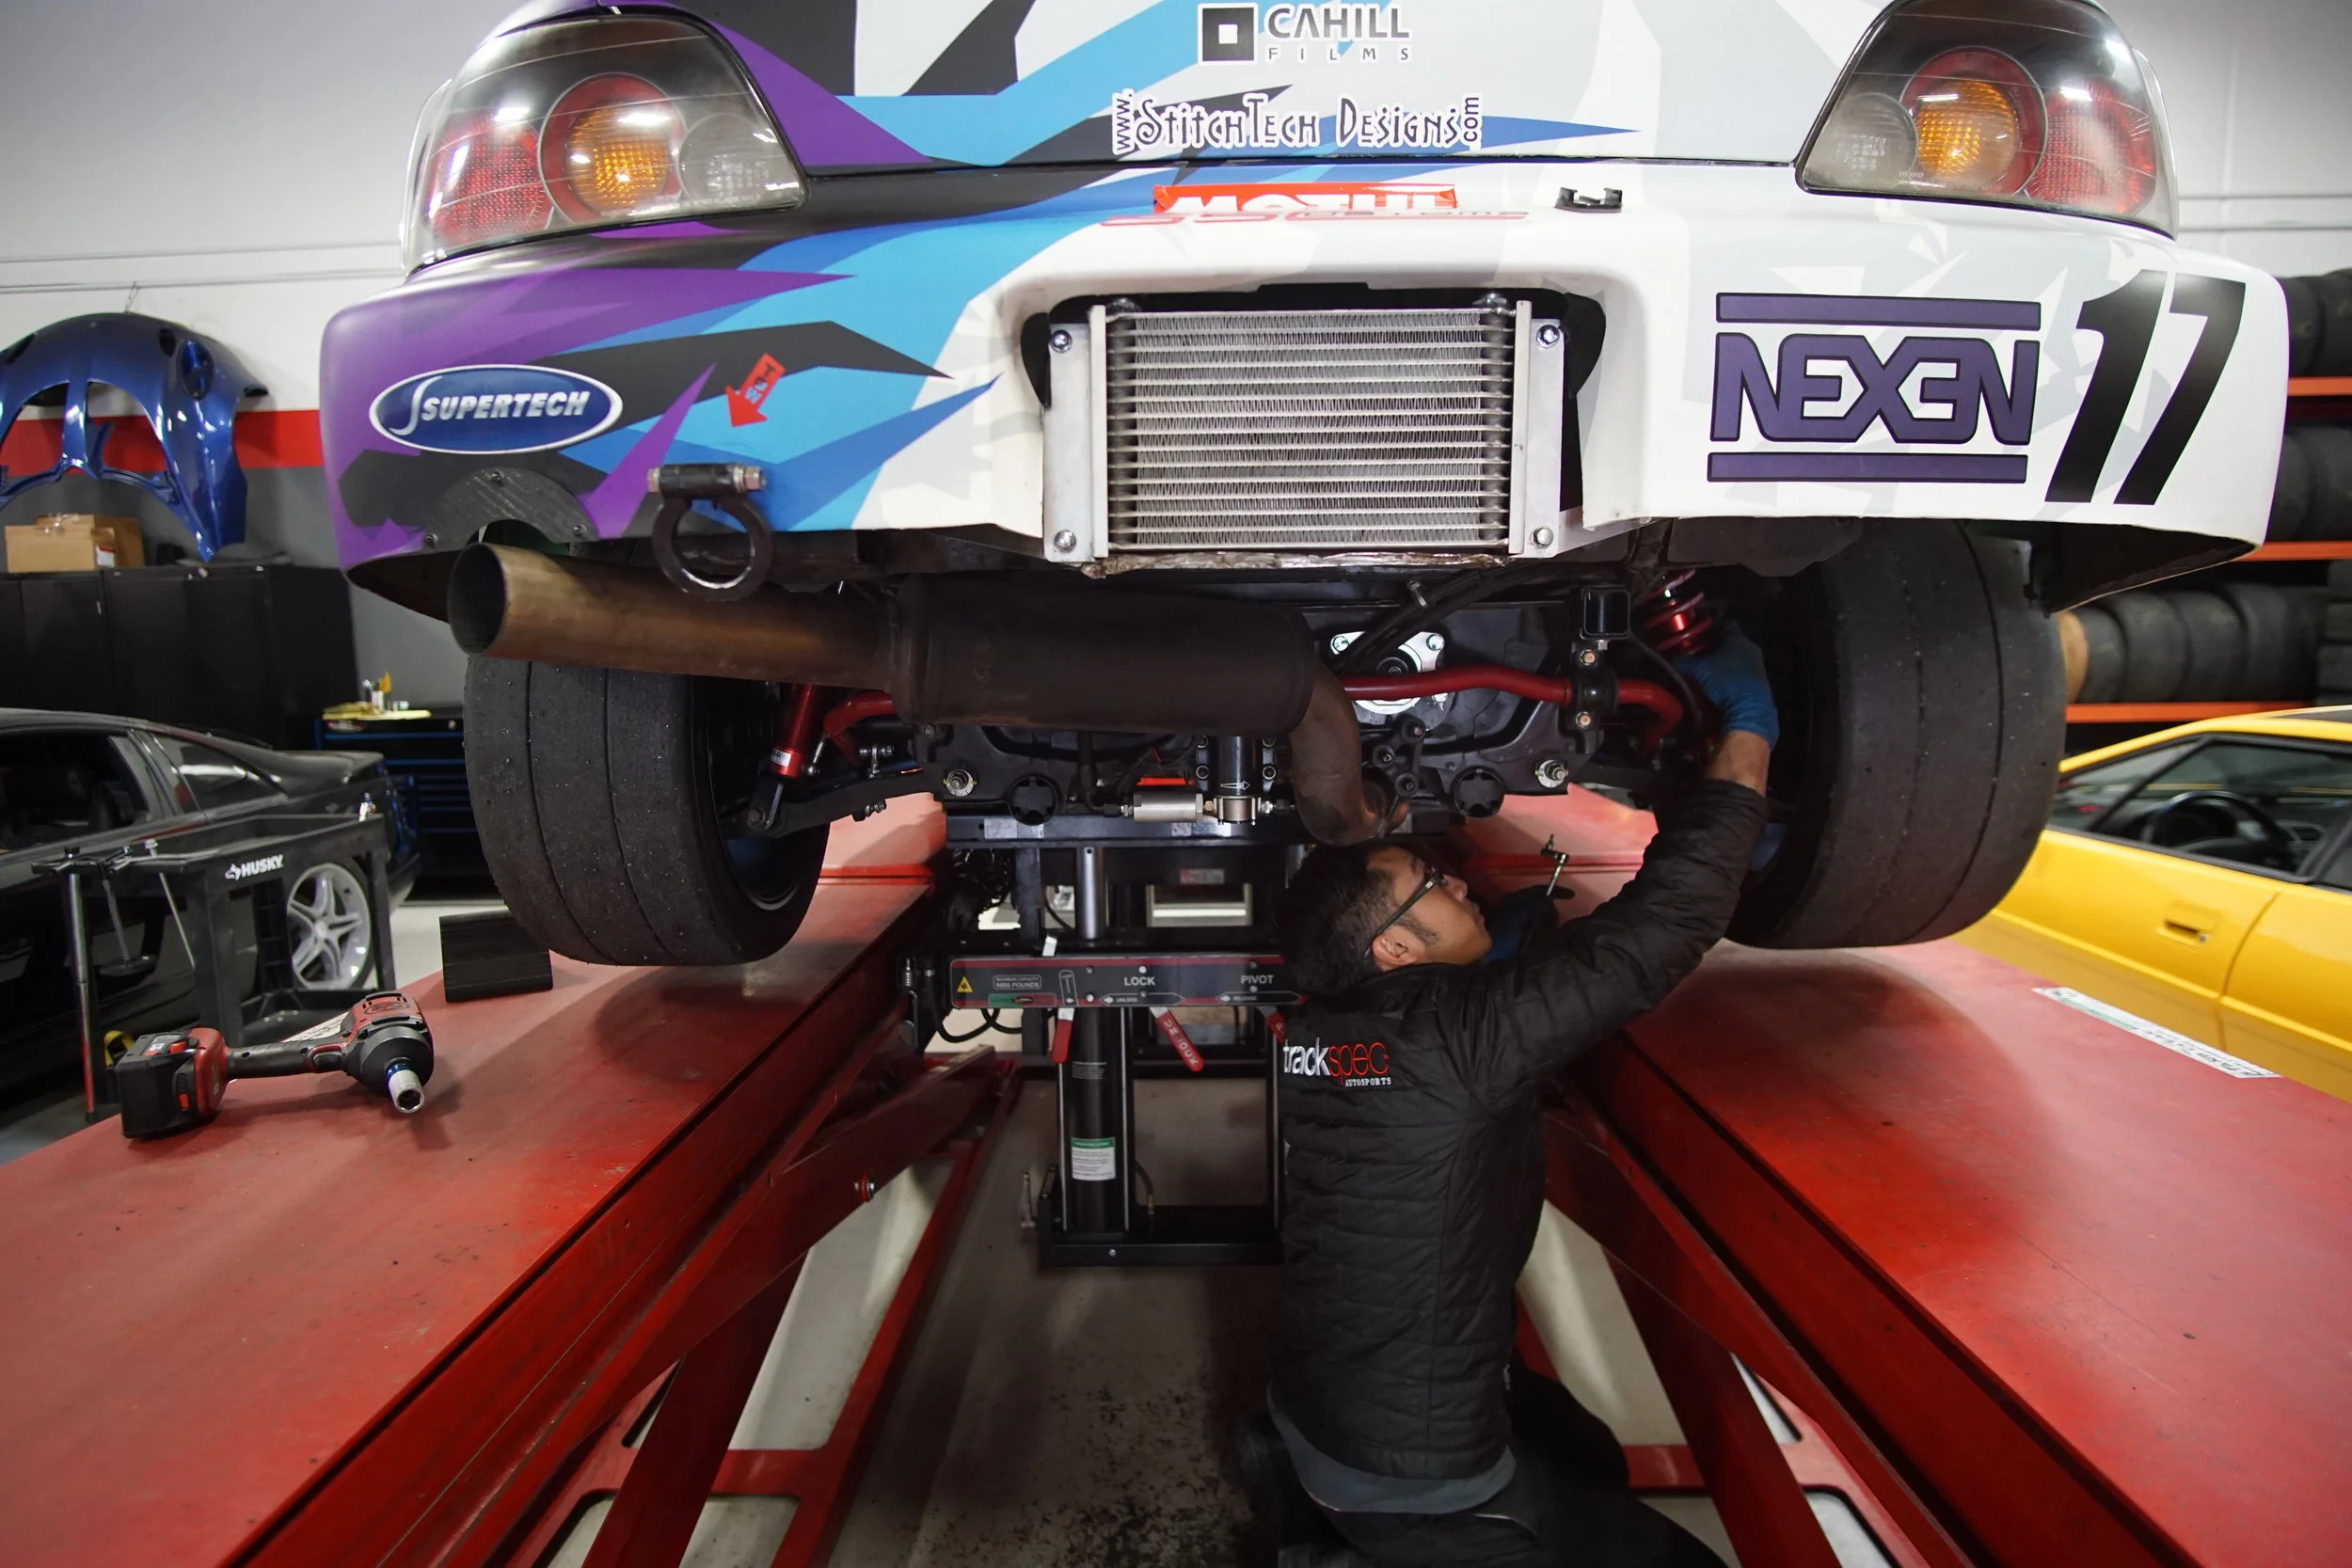
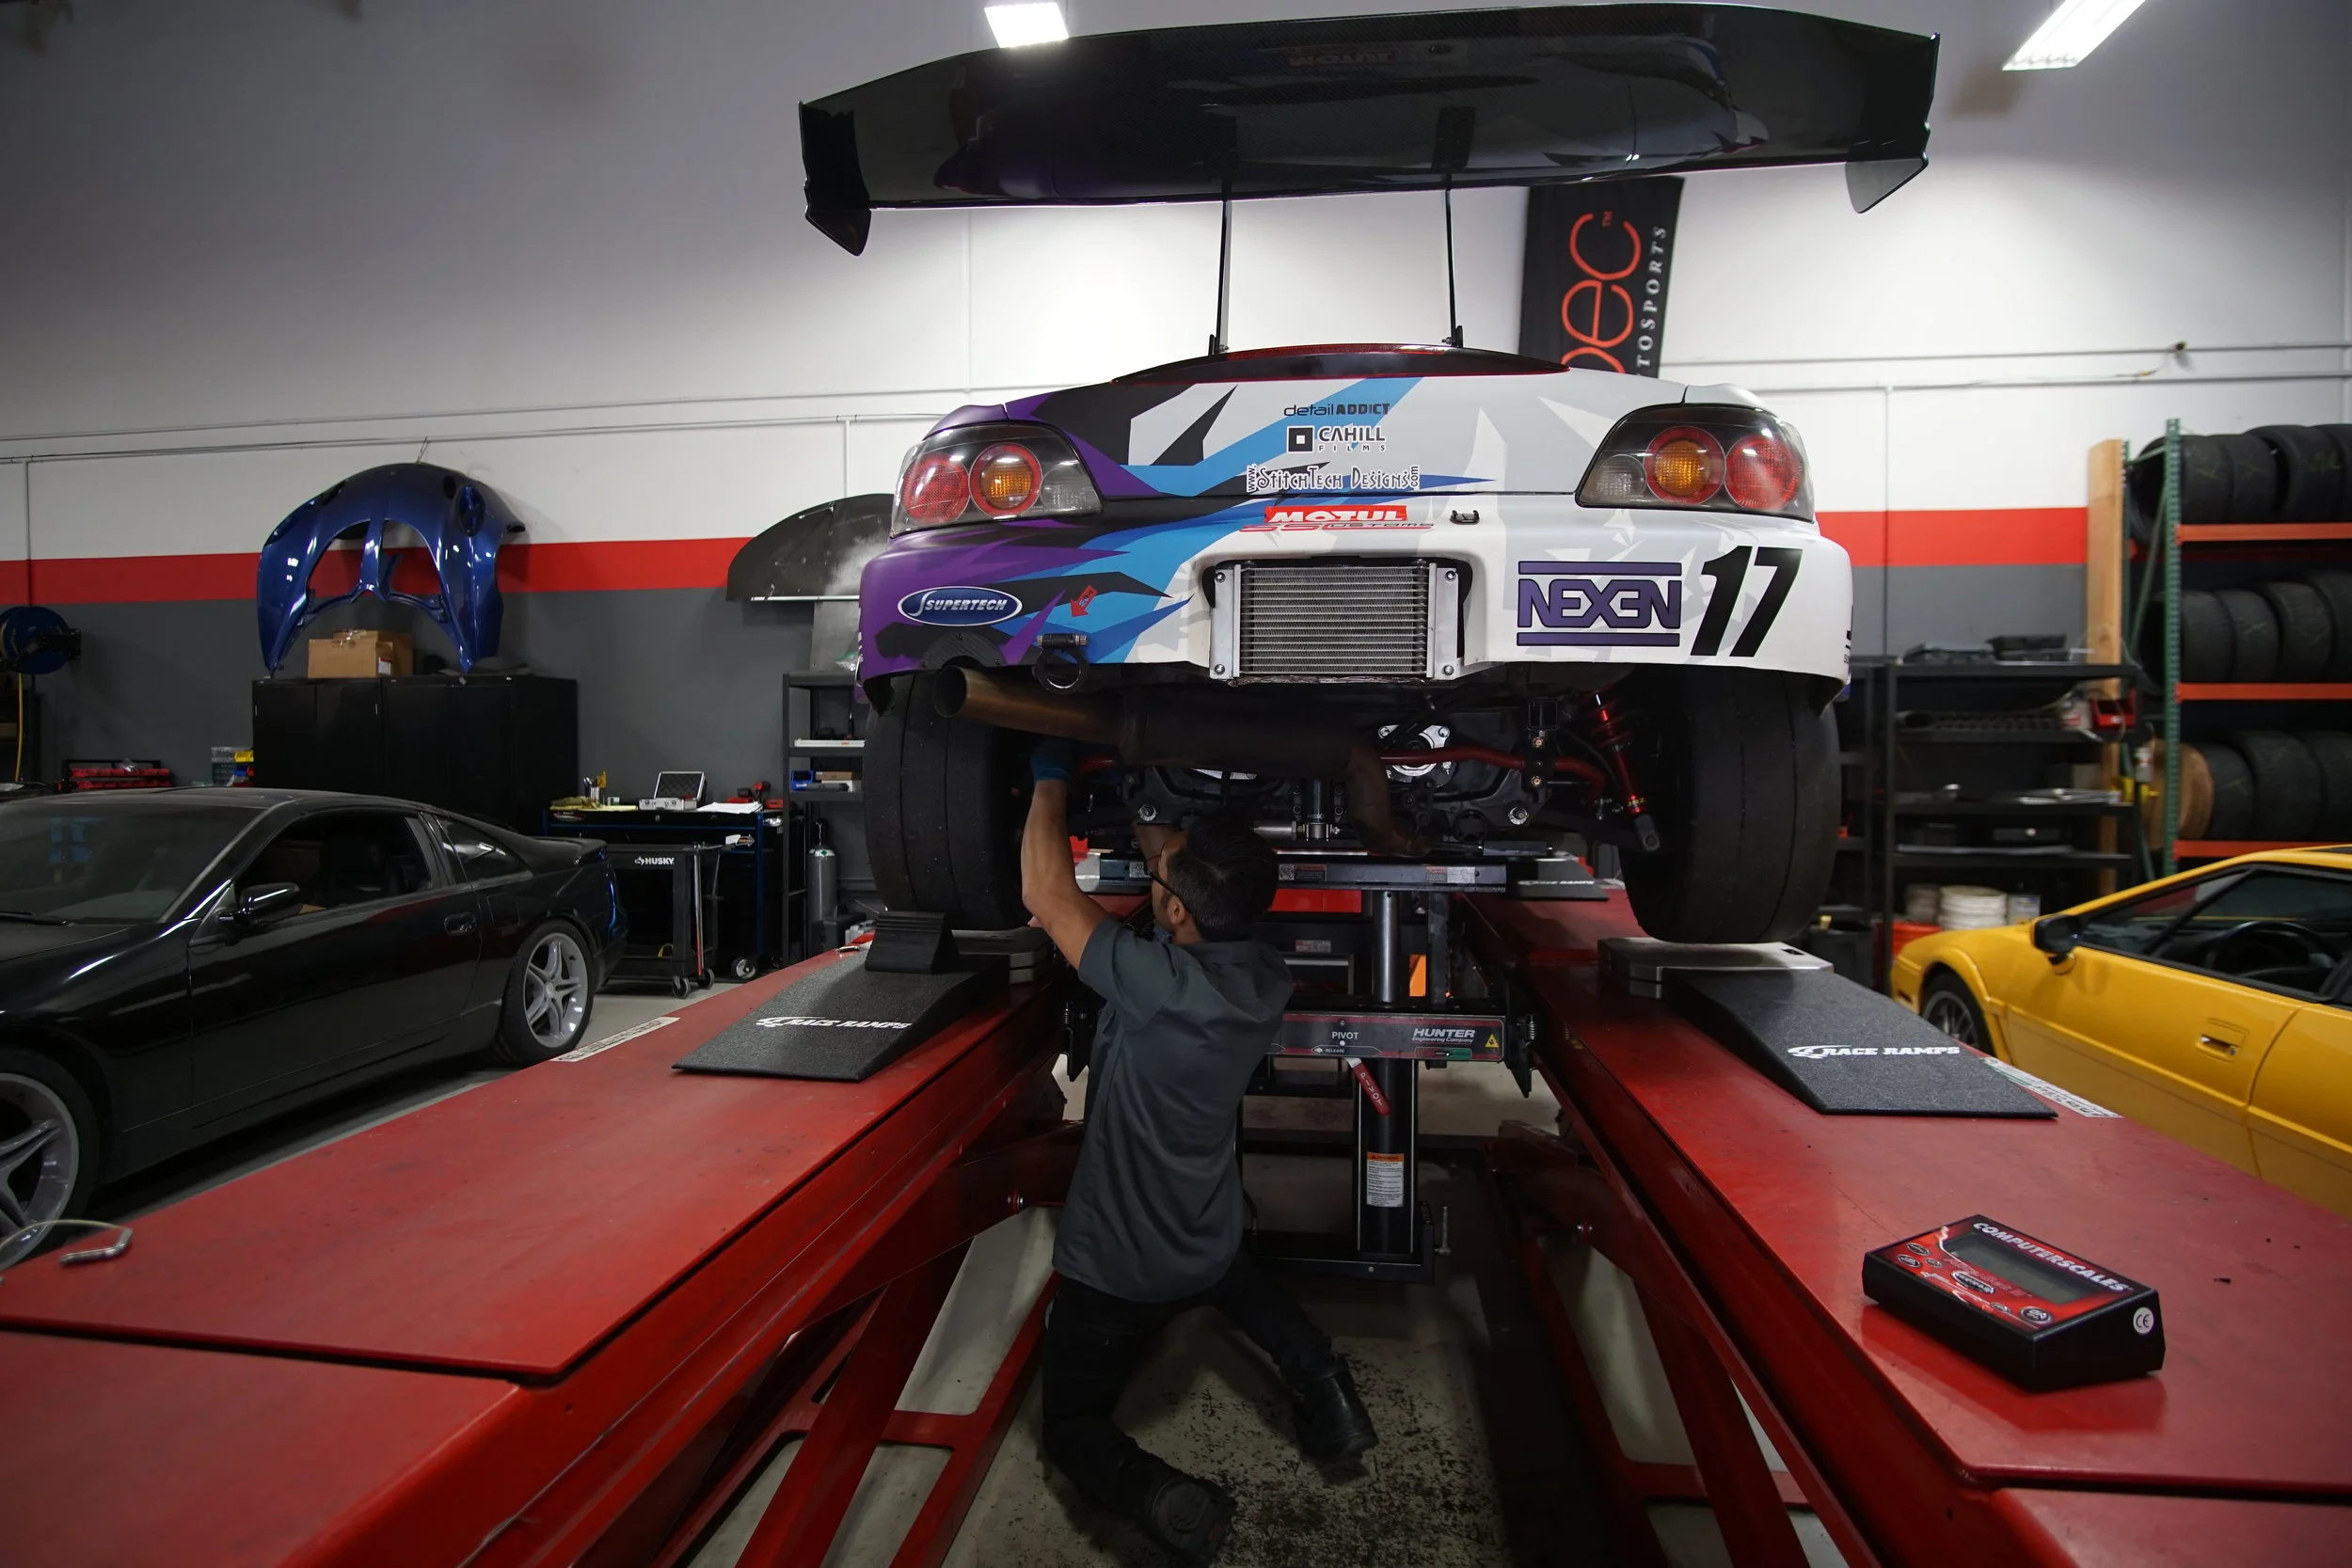
Fortunately, our alignment machine has built in slip plates. The rear rolling jacks don't go forward far enough to reach a jacking point on the car, so we use the ramps as platforms to roll the car back far enough to lift the rear end up for adjustments. Once your car is on the scales, chock the wheels and leave the car in gear. You don't want your car rolling off the scales! Most dedicated corner weighting scales will calculate the percentages you need, but we've created an spreadsheet to better visualize the weight distribution and help guide with the adjustments needed.

How to read the numbers
The cross weight is determined by the Right Front and Left Rear weight percentage. If the cross weight is above 50%, the car has a Wedge. If it's below 50%, it has a Reverse Wedge. Here are a couple rules to go by:
1. RAISING any one corner will INCREASE the weight on that corner and slightly affect all other corners.
2. LOWERING any one corner will DECREASE the weight on that corner and slightly affect all other corners.
3. Cross weight ABOVE 50%= DECREASE weight (height) on RF/LR or INCREASE weight (height) on LF/RR.
4. Cross weight BELOW 50%= INCREASE weight (height) on RF/LR or DECREASE weight (height) on LF/RR.
5. Make small adjustments at a time. The stiffer your spring rates, the more sensitive it will be to changes.
6. For consistency, make sure the suspension is fully settled each time you record the weights. This is probably the most important and tedious part of the job. Even with slip plates, we still like to jounce the suspension a few times just to make sure.
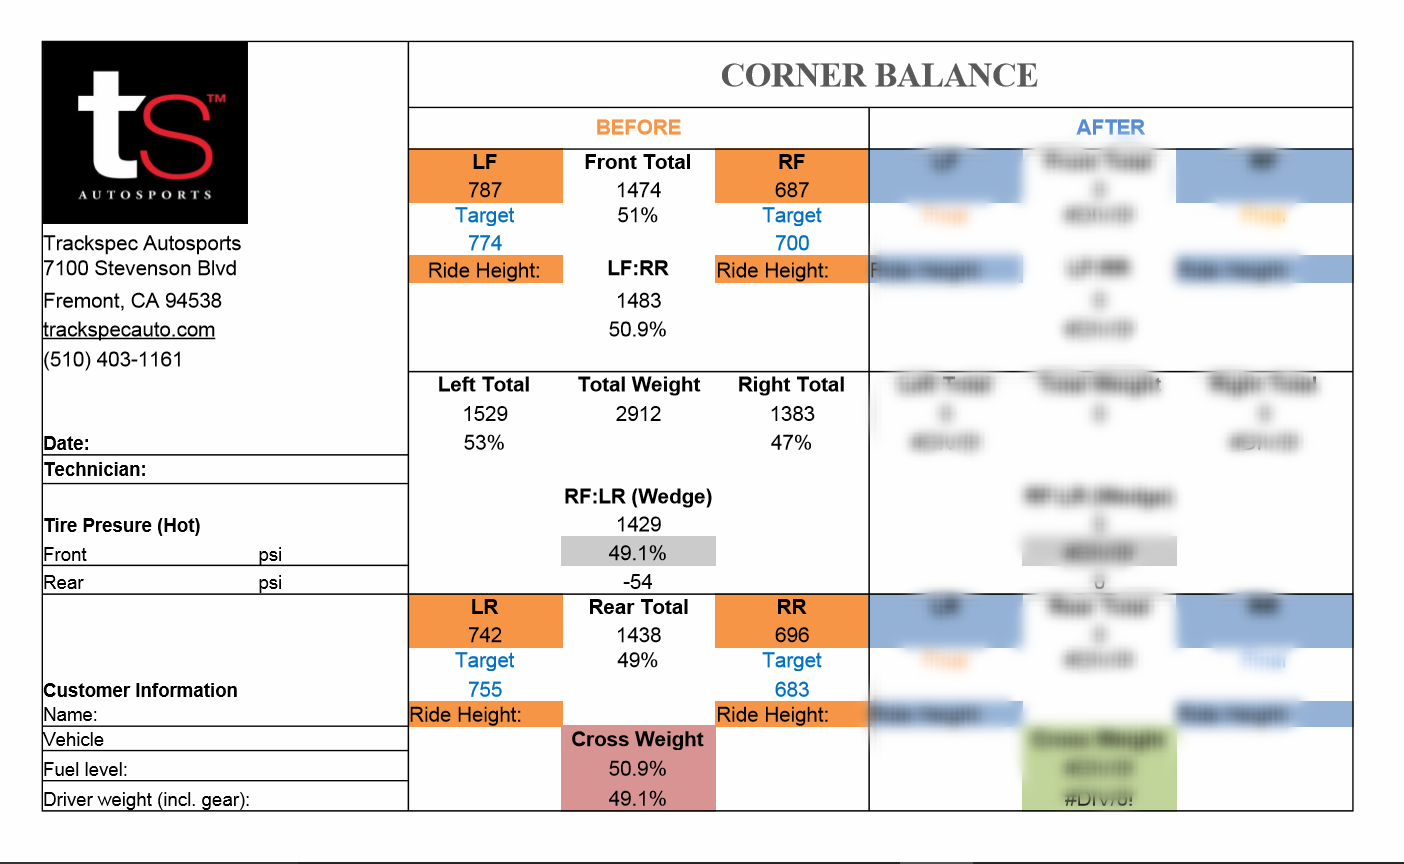
Here is what we measured with the car fully weighted with driver and fuel. This Honda S2000 in particular has a static weight distribution 52.4% Left and 49.4% Rear. This is not bad considering it had the original 4 cylinder motor replaced with a heavier V6. For this chassis, 50/50 would be ideal, but difficult to achieve because the driver sits on the left side. On a side note, there is a lot of debate on what static weight distribution is optimal. For example, research why Porsche 911s are rear weight biased. Because this S2000 has a Reverse Wedge, you can see that the formulas in our spreadsheet gives us a higher target value for the RF/LR and a lower value for LF/RR. In this case, we decide to raise the RF/LR. Keep in mind that the target values are just guides and you may not end up at those exact numbers to achieve a 50% cross weight. It is acceptable to be within a few tenths of a percent.
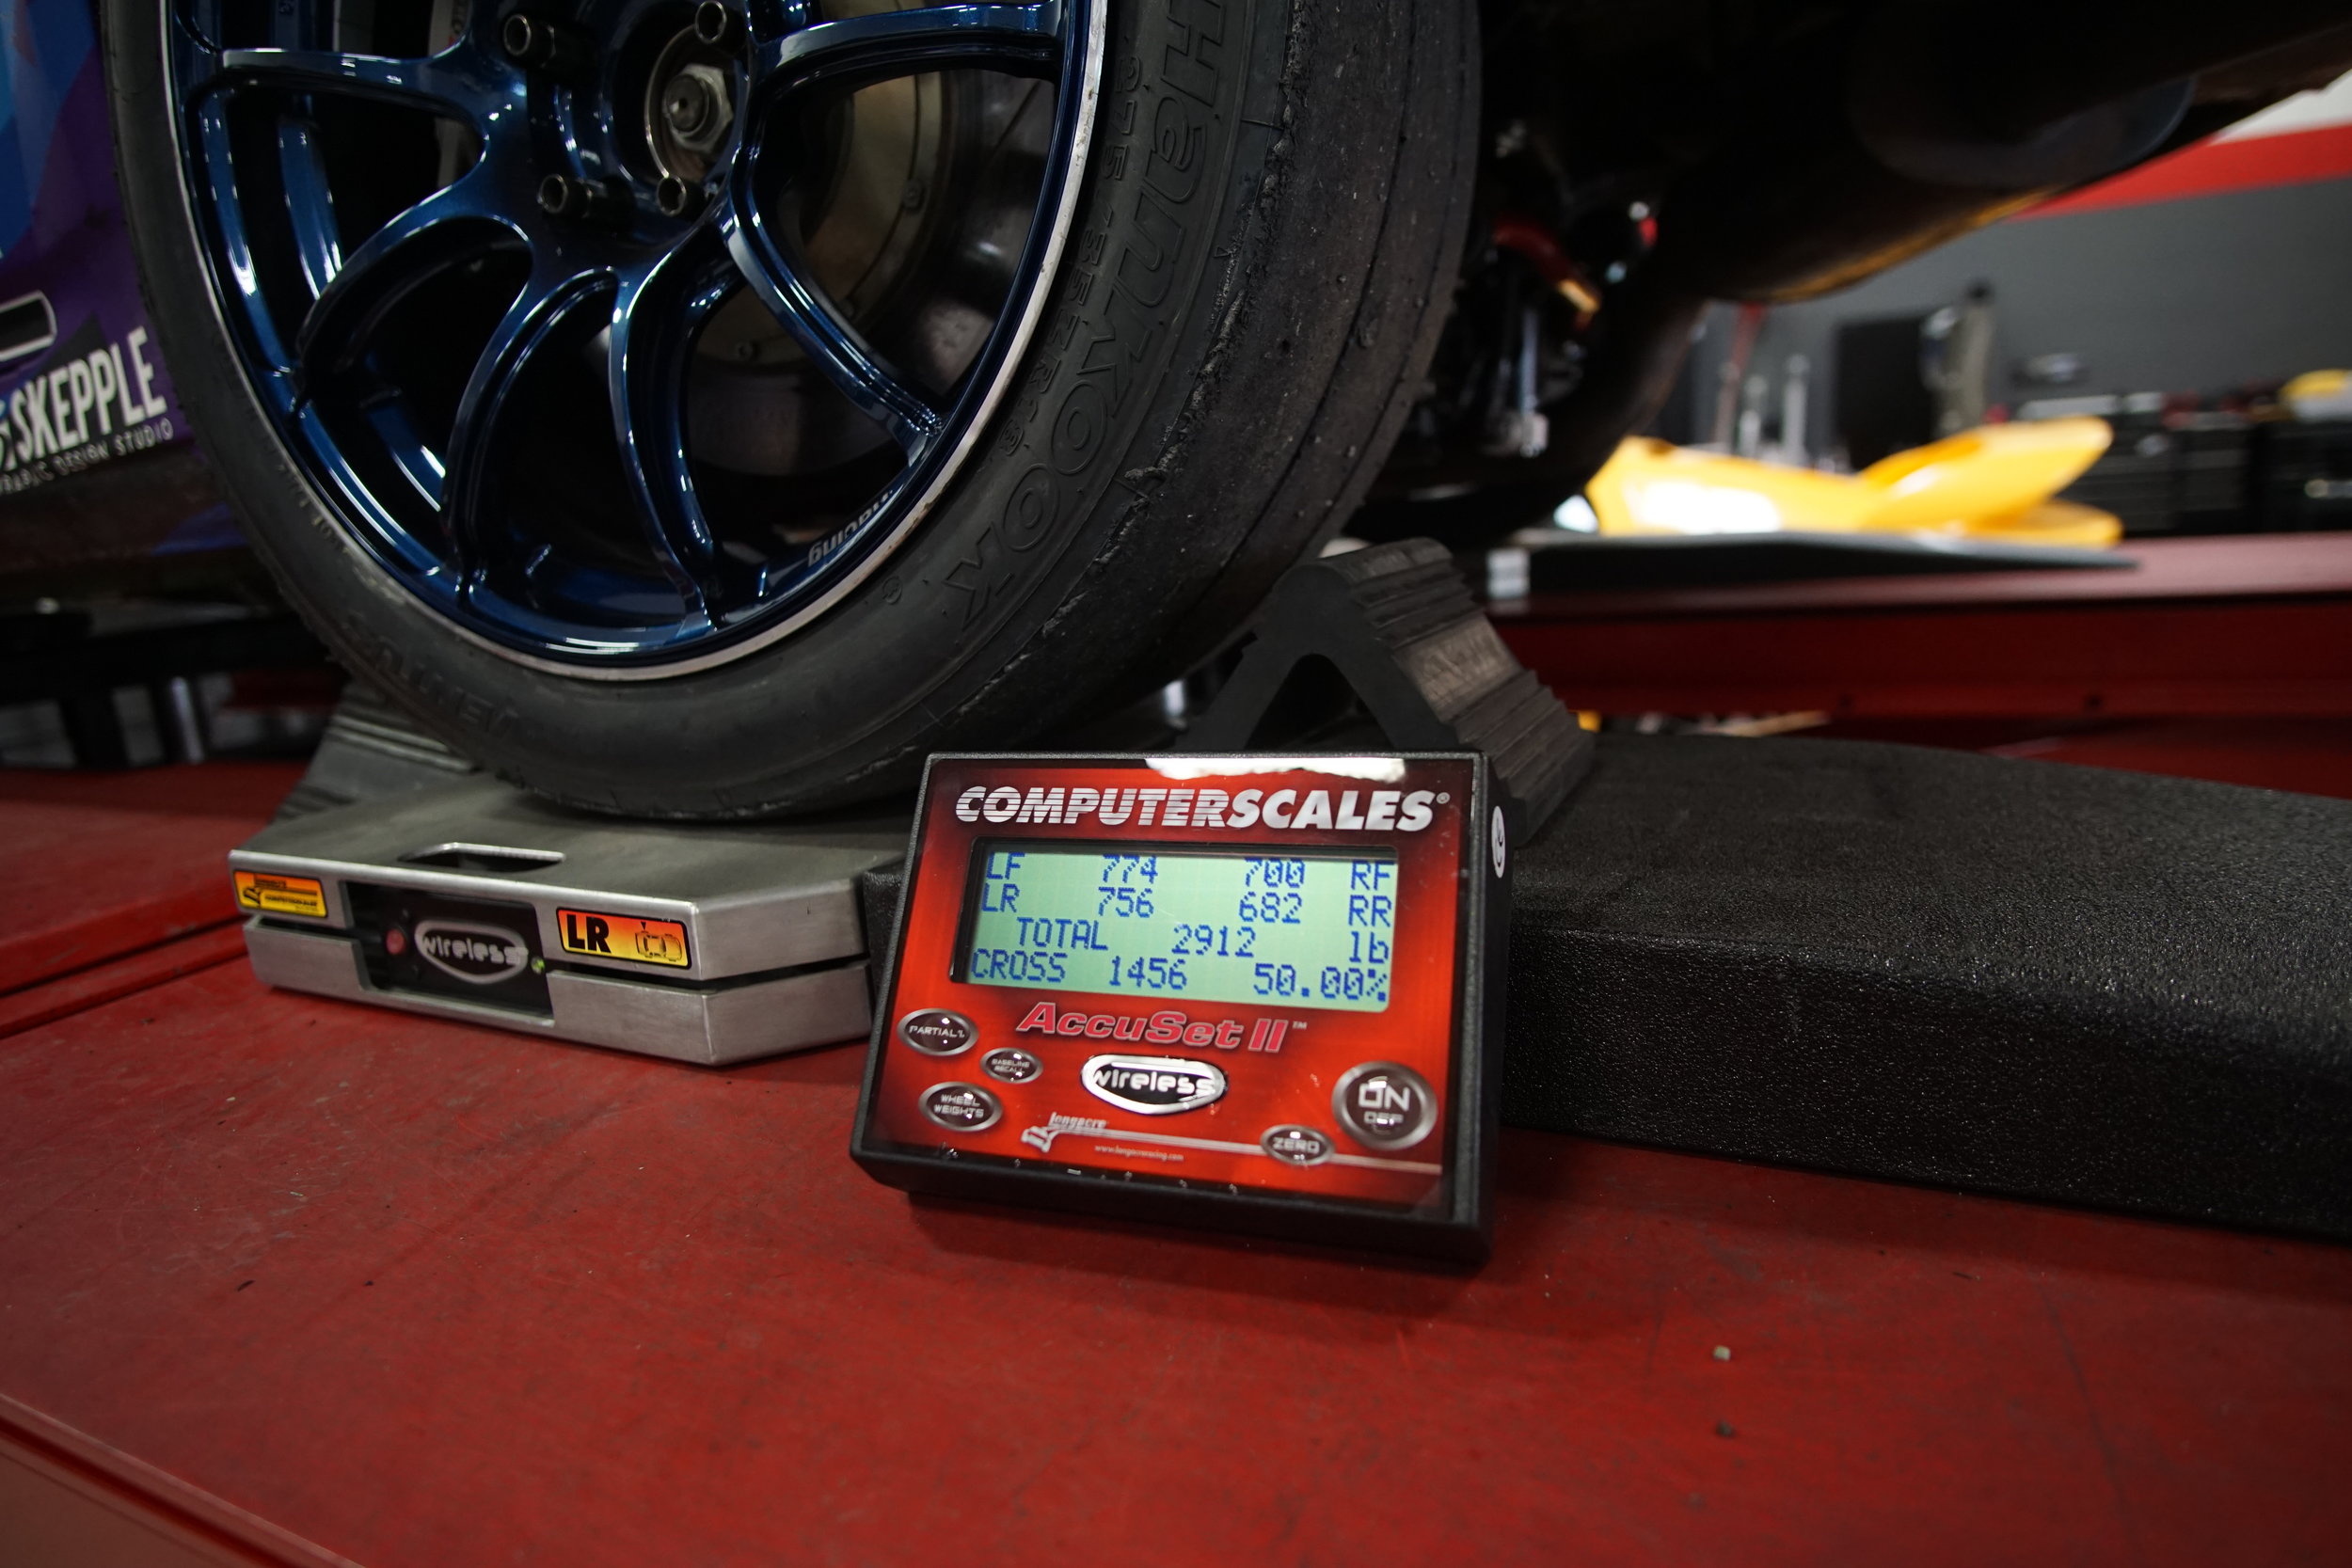
How much you should adjust the perches depends on springs rates, but you can start off with one turn at a time to gauge how much of a difference it makes. Even for someone who does corner weighting all the time, it took multiple adjustments to get this car perfect. Once we have our final numbers, we enter them into the spreadsheet for the owner's records.
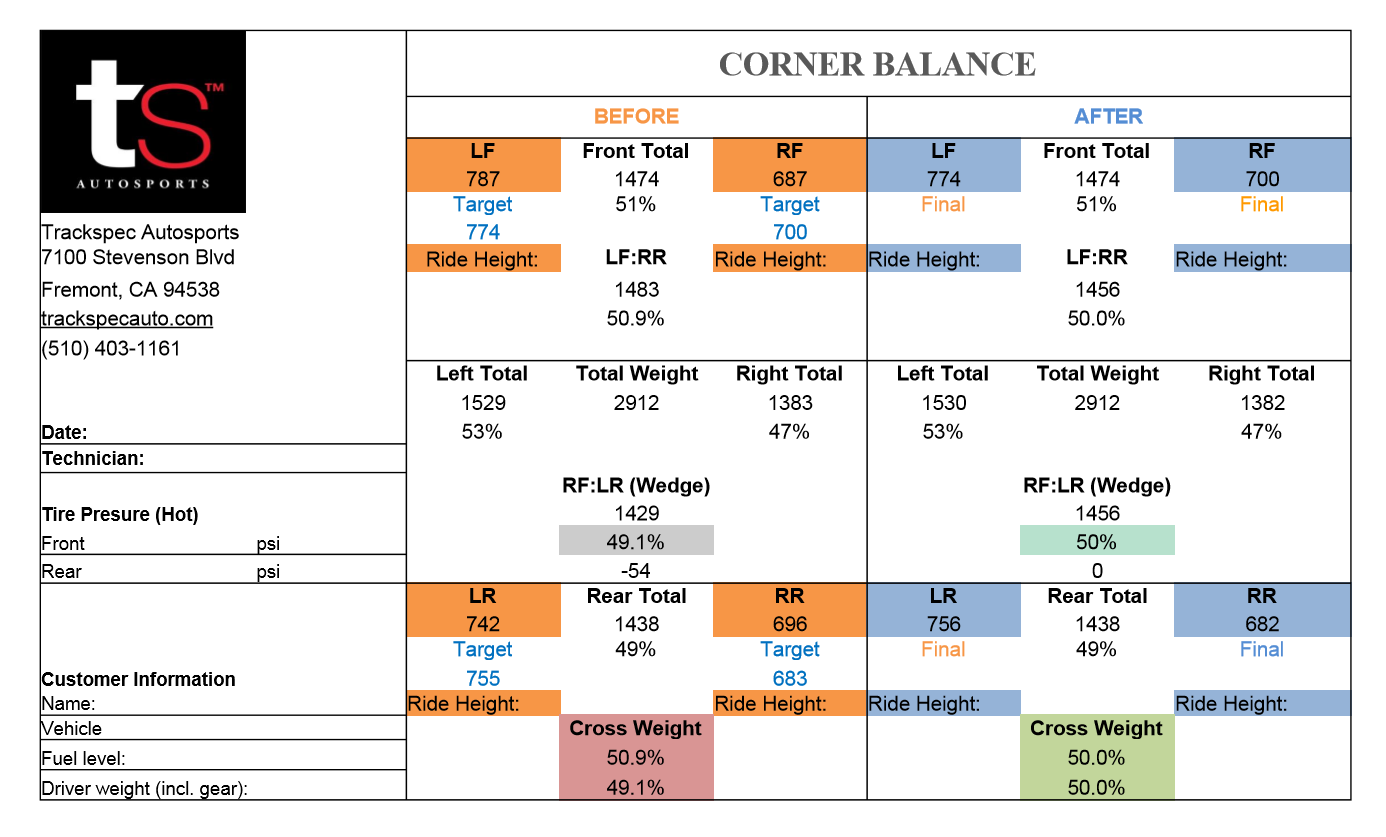
Comparing the before and after, you can see that there was an additional 54 lbs on the LF/RR corners, but we were able to zero that out and achieve a 50% cross weight with no wedge.
Connecting Swaybar Endlinks
Once the corner balance is done, you will want to reinstall your sway bar end links. Ideally, you will have adjustable end links so they can be reconnected without any preload. Your suspension will need to be fully loaded and settled when you reconnect them.
Final Alignment


Your alignment may have changed from the spring perch adjustments during the corner balance process. Do your final alignment and you're all done!